AI / ML Onboarding
Role Purpose
The AI/ML role focuses on transforming raw biomedical sensor data (from Arduino Nano 33 BLE Sense) into meaningful predictions, bridging data science and embedded systems. With this role, you will assist in enabling our projects to do things like detect heart rate, classify breathing patterns, or recognize voice commands. Through this onboarding and our projects you’ll learn how to:
- Collect and clean biosignal data.
- Extract features that highlight patterns in physiological signals.
- Train machine learning models (locally or with Edge Impulse).
- Deploy models efficiently onto microcontrollers for real-time inference.
Why This Role Matters
- Raw data is meaningless until processed. AI/ML turns numbers into useful biomedical insights.
- Real-time embedded ML unlocks portable medical tools (e.g., low-power sleep apnea detectors, stethoscopes, arrhythmia detection).
- Your work ensures EMBS projects are smart, innovative, and impactful.
Onboarding Process
- Learn → Complete tutorials/resources.
- Learning Check → Google form submission.
- Demo → Successfully deploy and demonstrate EMG model.
- Review → Officer approves learning check submission, demo, and demo file submission.
- Role Assignment → Discord role updated to AI/ML
- Integration → Begin contributing ML models to real club projects.
Skills to Learn
Data Pipelines
- How to collect sensor data from Arduino BLE Sense.
- Cleaning noisy signals (filtering, normalization).
- Labeling datasets for supervised ML tasks.
Feature Extraction
- Time-domain: mean, variance, zero-crossings.
- Frequency-domain: Fourier Transform (FFT), spectrograms.
ML Frameworks
- Edge Impulse: beginner-friendly platform for embedded ML.
- TensorFlow Lite Micro: running models directly on MCUs.
- scikit-learn: simple Python models for rapid testing.
Embedded Deployment
- Quantization: shrinking models for MCU use.
- Model conversion: preparing .tflite files.
- Loading models: deploying to Arduino BLE Sense.
Learning Tools
Data Pipelines (collect, clean, label sensor data)
- Signal Processing Techniques in Python (SciPy Docs)
- Covers filtering, normalization, and basic preprocessing for noisy biosignals.
Feature Extraction (turning raw data into inputs for ML)
- Feature Extraction from Time Series – sktime Documentation
- Shows how to compute time-domain (mean, variance, zero crossings) and frequency-domain (FFT, spectrogram) features.
- Fourier Transformations
- Fourier Transformation Video
- Signal Processing And AI
- Article on signal processing and its key concepts.
ML Frameworks (training + testing models)
- Edge Impulse + Arduino Docs
- Beginner-friendly: step-by-step for training and deploying models with Arduino Nano BLE Sense.
- scikit-learn User Guide
- Teaches classical ML (SVM, Random Forest, logistic regression) for prototyping with labeled datasets.
- TensorFlow Lite Micro Documentation
- Covers running ML on microcontrollers, including Arduino boards.
Embedded Deployment (making ML models run on tiny devices)
- TensorFlow Lite Model Optimization Toolkit
- Explains quantization and model shrinking for embedded deployment.
- TinyML Book (free online previewt)
- Great for understanding the whole pipeline: sensors → features → ML → deployment on MCUs.
Learning Check
Complete this knowledge check using the materials above.
Demo
This part of the guide walks you through installing TensorFlow Lite Micro on Arduino, reading EMG data from a uMyo BLE sensor, training a simple ML model in Python, and running that model back on the Arduino.
Create Your Working Folder
- Download and extract the master embs_ml_training folder and extract to location of your choosing
- You’ll store all related files here: Arduino sketches, Python scripts, and EMG data.
Install TensorFlow Lite for Arduino
- Instructions: Official TFLite Micro Arduino Examples
- (If you don’t have Git, install it from **Git Download**)
- cd ~/Documents/Arduino/libraries or whatever path to your arduino libraries
- git clone https://github.com/tensorflow/tflite-micro-arduino-examples.git
- Go to the folder:
Documents/Arduino/libraries/Arduino_TensorFlowLite/src/tensorflow/lite/ - If you don’t see
version.h, create it by copying and pasting the version.h file or by copying one of the other.hfiles and renaming it toversion.h. Within this file, paste:#ifndef TENSORFLOW_LITE_VERSION_H_ #define TENSORFLOW_LITE_VERSION_H_ #define TFLITE_SCHEMA_VERSION (3) #endif // TENSORFLOW_LITE_VERSION_H_
- Open Arduino IDE → File → Examples → Arduino_TensorFlowLite
- Try uploading an example (like hello_world).
- If it compiles and uploads successfully, TensorFlow Lite is installed!
Set Up Mircophone Sensor Sensor
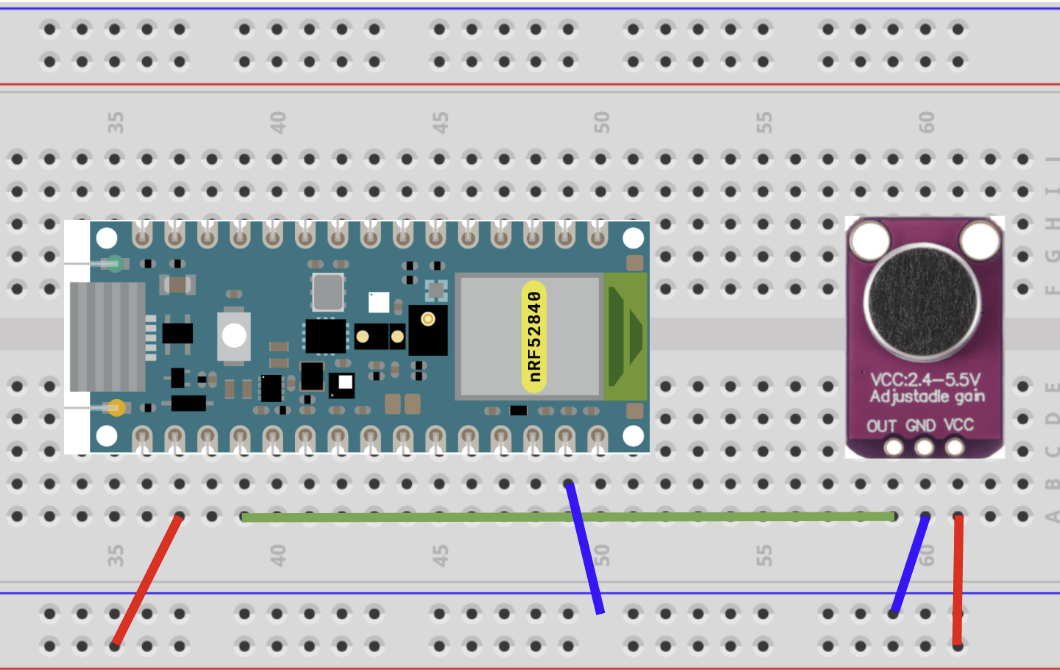
- Wire the microphone to the arduino
- Plug arduino and microphone into breadboard
- Wire the 3.3V pin on the arduino to the red breadboard railing
- Wire the ground pin on the arduino to the blue breadboard railing
- Wire the A0 pin on the arduino to the OUT pin on the microphone (MAX4466)
- Wire the VCC pin on the microphone to the red breadboard railing
- Wire the GND pin on the microphone to the blue breadboard railing
- Here is a completed wiring of the devices:
- Upload save the mic input folder to your computer
- Open the mic_input.ino file
- Plug in the USB cord from your computer to the arduino if you havent already
- Upload the code to the arduino
- Open Serial Monitor
- Speak and hold the same volume into the microphone
- You should see numbers changing.
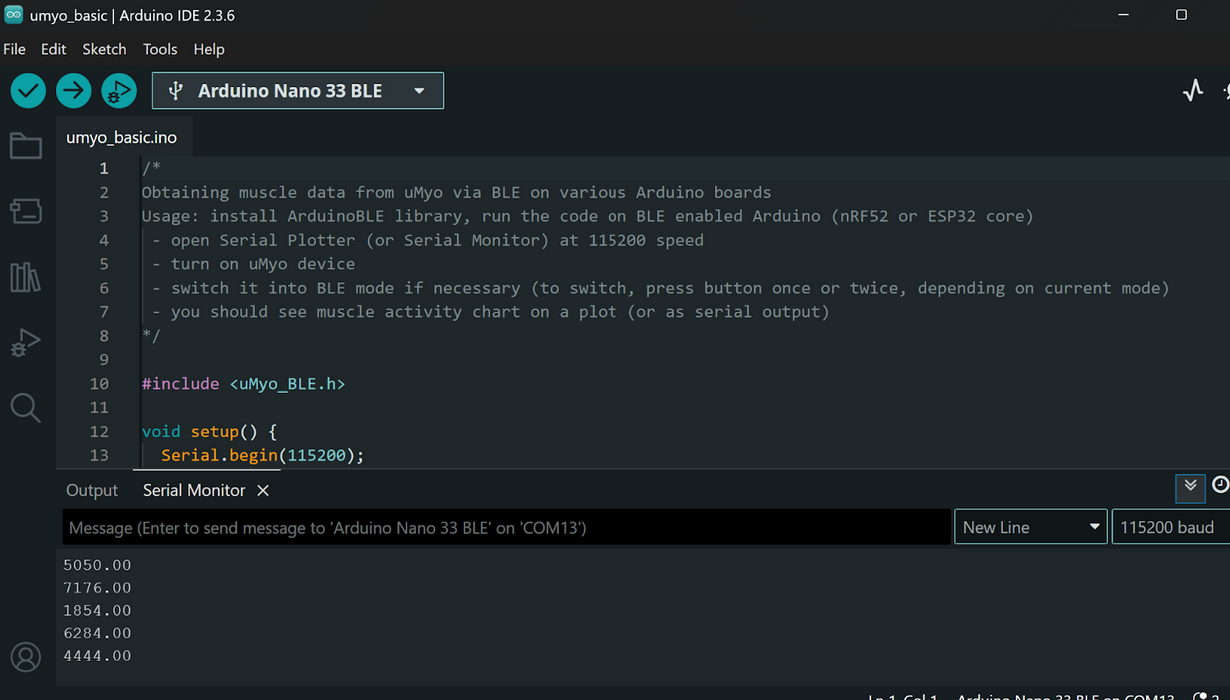
- You should see numbers changing.
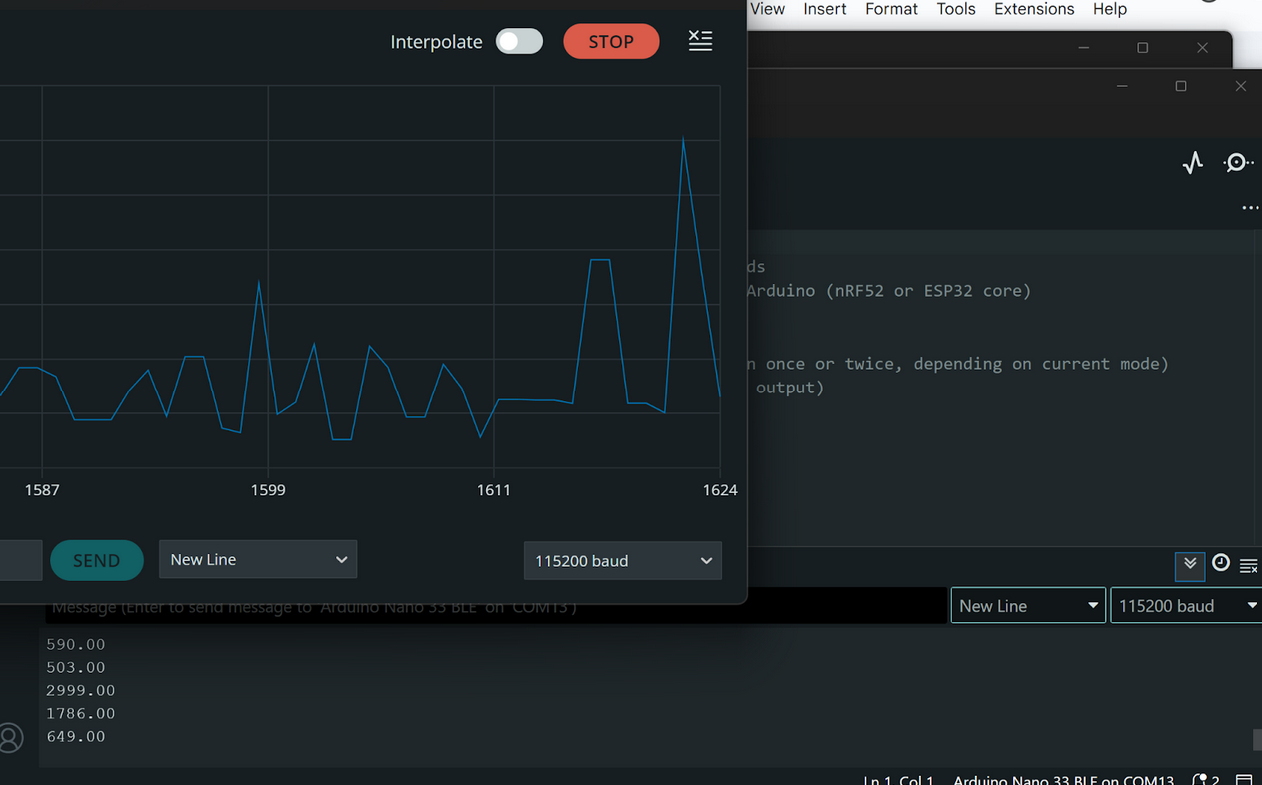
- Switch to Serial Plotter to visualize it.
- Values rise when you speak and fall when silent.
- If no change, ensure your device is paired and connected via BLE.
Collect Microphone Data
- Paste the code from the embs_data_collection.ino file in the embs_ml_training folder into the sketch and upload.
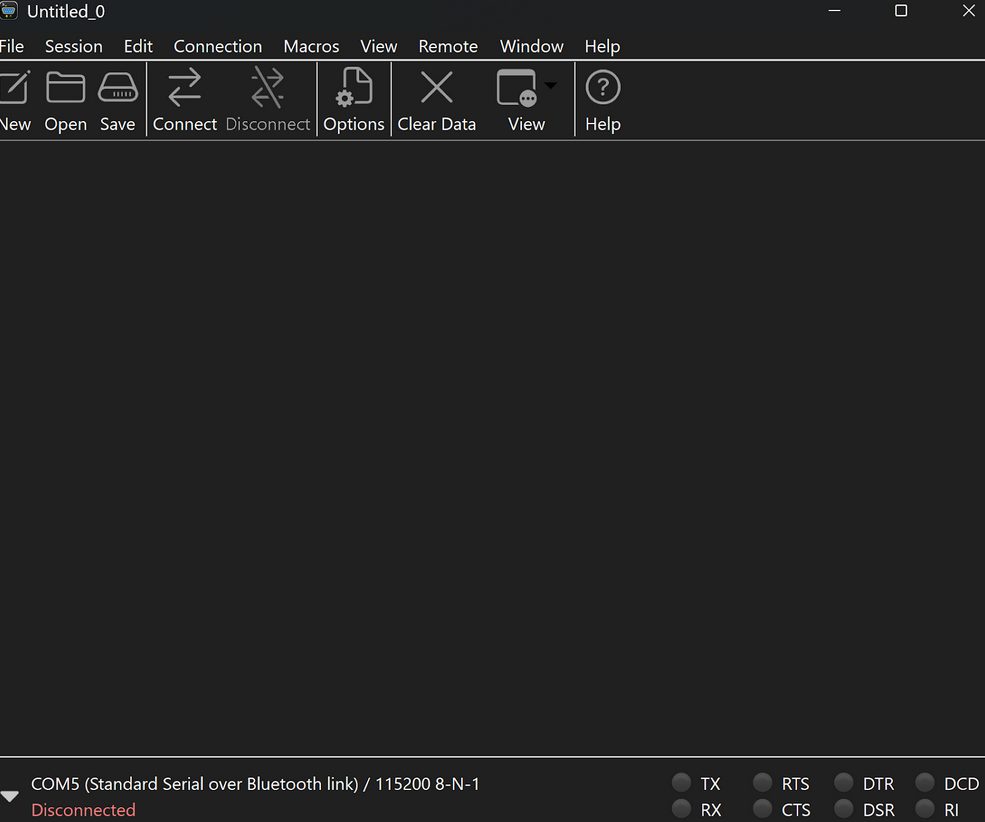
- Download CoolTerm (free serial monitor):
- Close Arduino’s Serial Monitor (only one app can use the port).
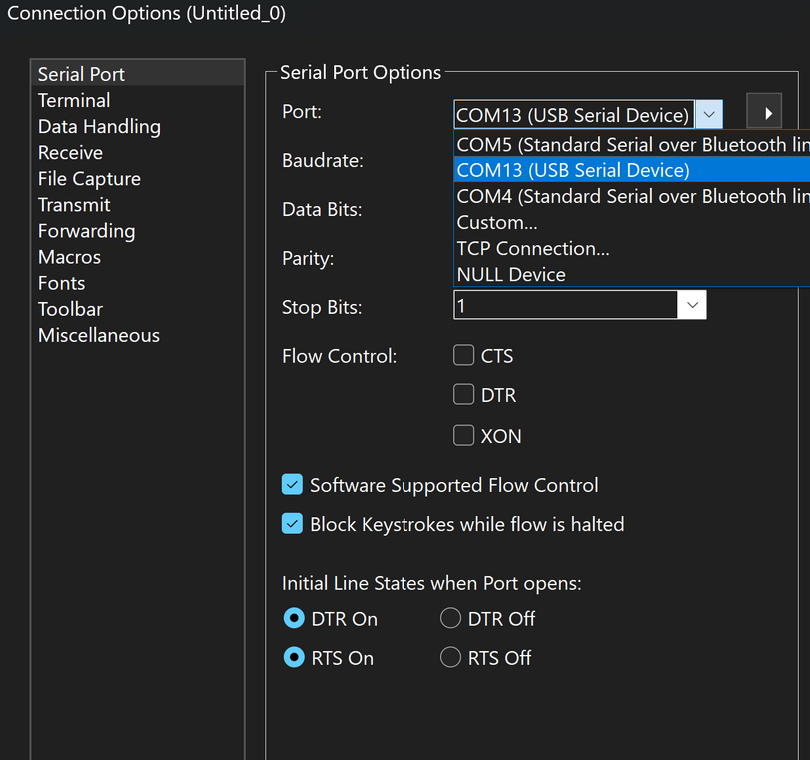
- Open CoolTerm → Options → Serial Port → choose the same COM port you have been using
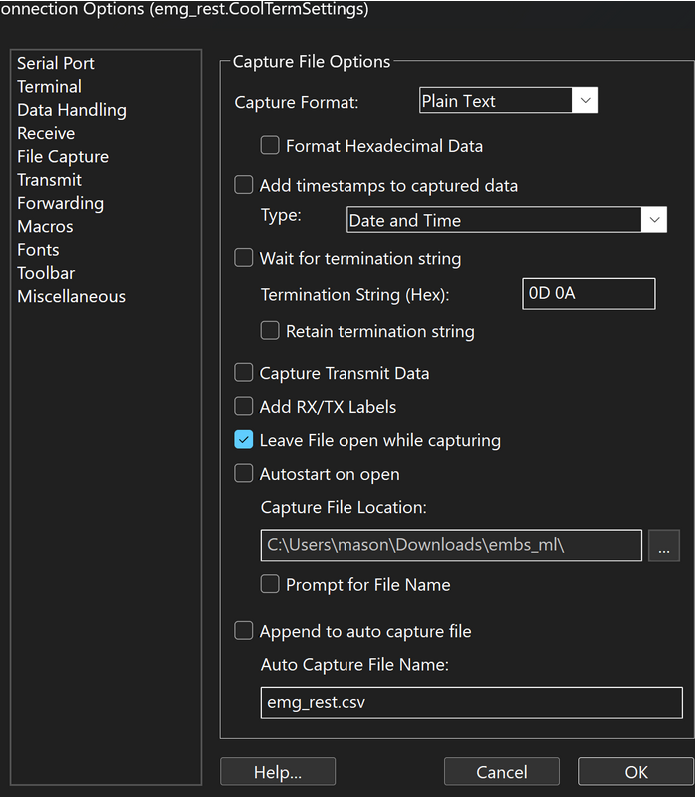
- Set the file capture to these settings
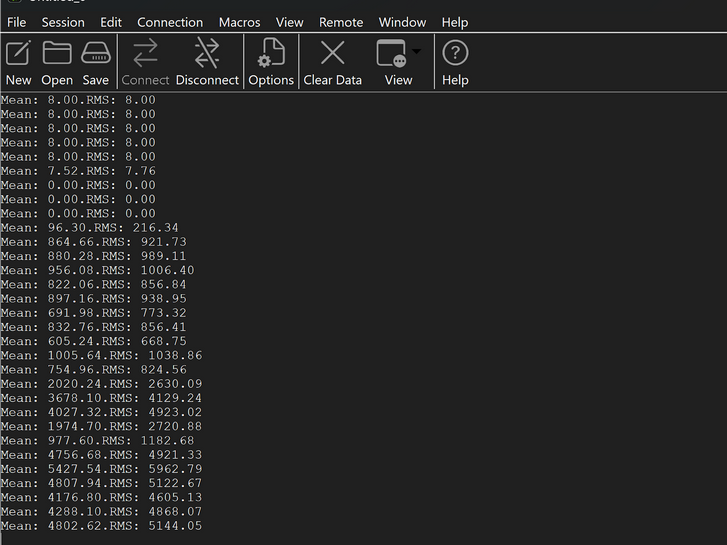
- Click Connect, you should see live readings.
- Press Ctrl + R to start recording data and Press Ctrl + R again to stop recording
- Flex and rest separately for 15–30 seconds each:
- Turn off uMyo in between recordings to save battery.
- emg_rest.txt
- emg_flex.txt
- Open the text files and delete outliers from the start and end of your recordings
Train the Machine Learning Model
- Install latest version of Python 3
- pip install tensorflow pandas scikit-learn numpy matplotlib
- pip install seaborn jupyter
- Open train_emg_model.py (from the provided files or repo).
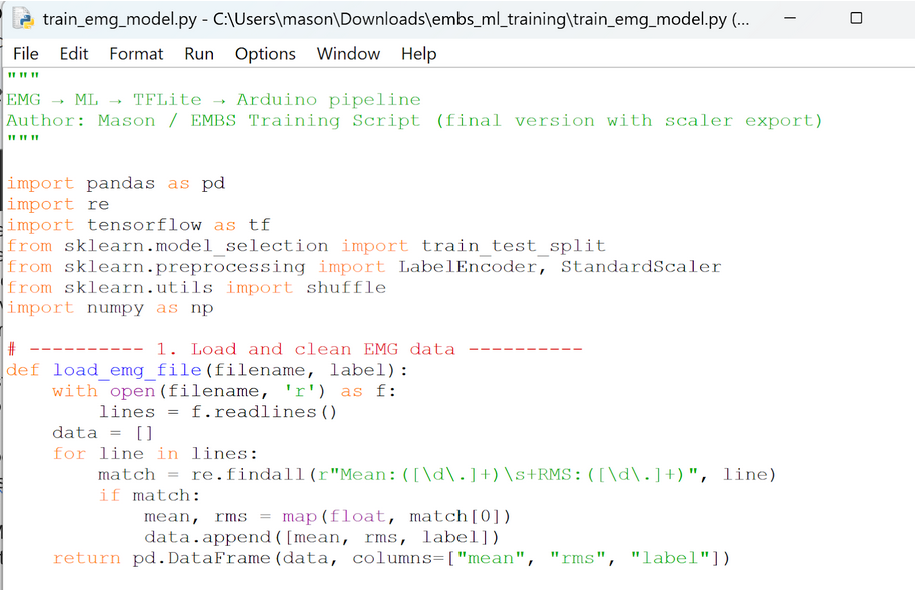
- python train_emg_model.py
- Read your data files.
- Train a basic neural network.
- Generate a model.h file for Arduino.
- Create scalar_constants.txt with normalization values.
Deploy Model to Arduino
- Copy model.h → into your Arduino sketch folder.
- Open a new sketch and paste the code from emg_training.ino in the embs_ml_training folder given to you
- float mean_mean = FILL HERE;
- float std_mean = FILL HERE;
- float mean_rms = FILL HERE;
- float std_rms = FILL HERE;
- Upload to Arduino.
Test the Model
- Open Serial Monitor and flex or rest.
- The output should indicate which state (rest, pinch, flex) is being recognized.
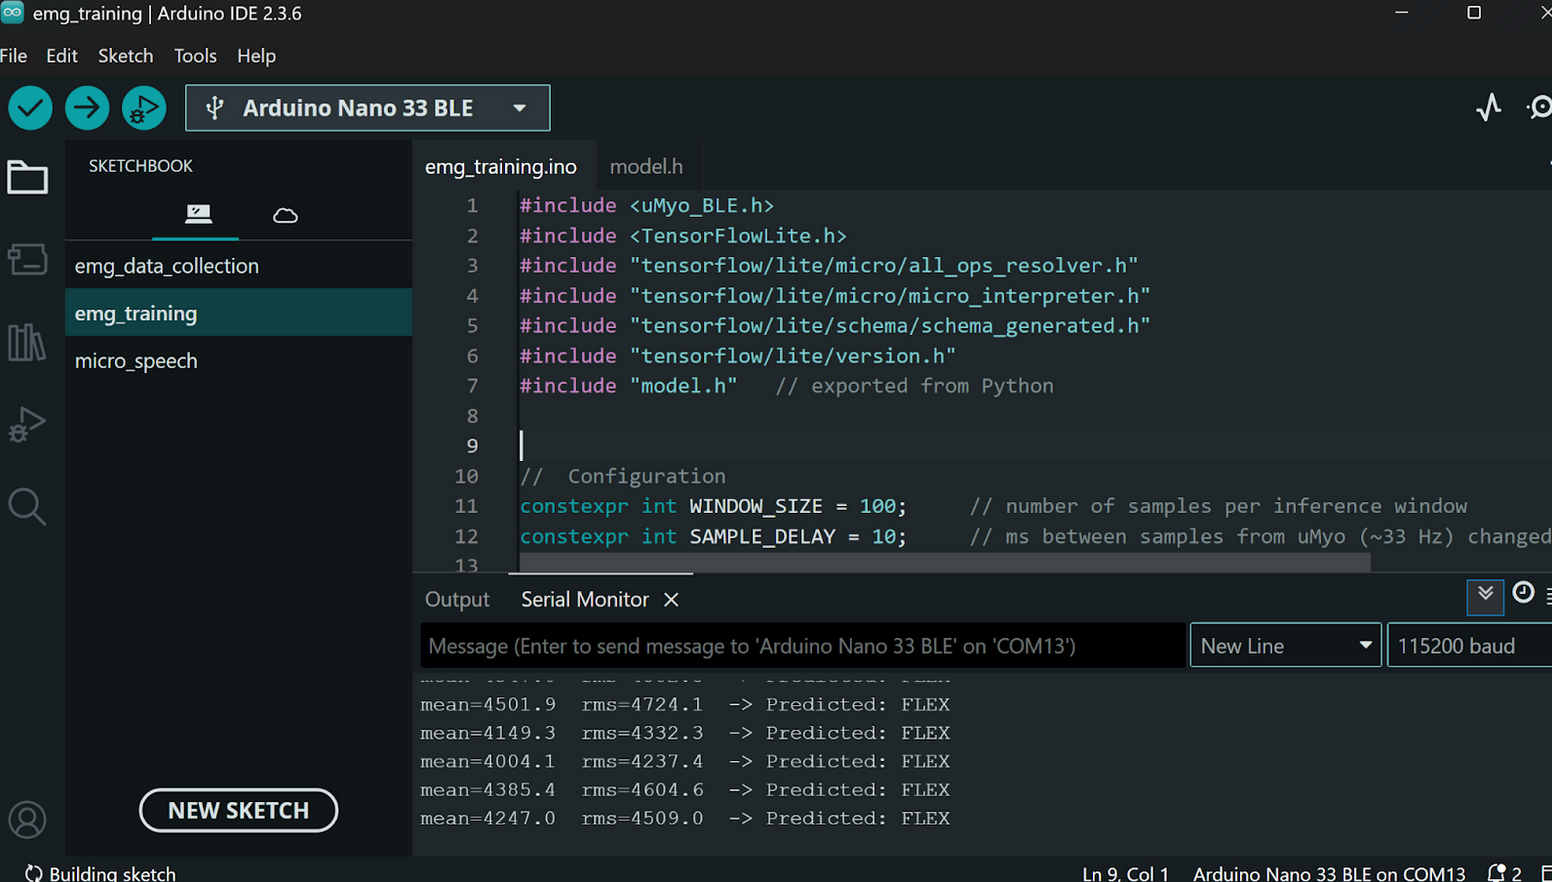
- Demonstrate your working model to the club chair.
- Submit all files used here.