Frimware / Software Onboarding
Onboarding Steps
- Learn → Review the Firmware learning resources
- Run Example → Run the DigitalReadSerial.ino example
- Learning Check → Complete the learning check
- Assignment → Small firmware project for debuging and demoing a the thermistor
- Demo → Show your working thermistor circuit to an officer/mentor for verification
- Review → An officer will check your code for correctness and readability
- Role Update → You’re marked as ‘Firmware Verified’ in the onboarding tracker and gain access to the firmware-team channel
Purpose of Firmware Role
Firmware engineers in EMBS are responsible for bringing the hardware to life, and without firmware, the medical prototype cannot collect or send any meaningful data. Firmware engineers are responsible for writing and debuging the code that will…
- Read data from sensors (temperature, microphone, accelerometer, etc.)
- Process the data in real time (filtering, feature extraction, etc.)
- Communicate with other devices or modules (via Bluetooth, UART, SPI, I²C)
- Provide the “glue” between hardware, AI/ML models, and project logic.
Prerequisites To Onboarding
Background Skills:
- Familiarity with basic C, C++, or Python (variables, loops, functions).
- Comfort and understanding of how to use a text editor / IDE.
Tools Needed:
- Arduino IDE
- Download & install → Arduino IDE
- Add Arduino BLE Library (needed for Nano 33 BLE Sense).
- Download & install → Arduino IDE
- Wokwi Simulator (Optional, This is a handy tool for testing code)
- Wokwi Arduino Simulator → lets you test simple sketches online without hardware.
- Git & GitHub
- Install Git → Git Download
- Create a GitHub account → Join GitHub
- Work through Hello World GitHub Guide if not familiar with GitHub (Optional)
Skills You Will Learn Through Onboarding
This first portion of onboarding is meant to build some knowledge and skills that will becaome very useful when working on our projects as a firmware team member. As such, please take some time to look into the resources and learn skills in:
Programming Foundations
- Write clean and readable C++/Arduino code.
- Understand variables, data types, loops, and conditionals.
- Use functions to structure code.
Embedded Systems Concepts
- Pin modes and digital/analog I/O.
- Using Serial Monitor for debugging.
- Reading sensor values and processing them.
- Using timers and delays responsibly.
Hardware Communication
- I²C and SPI basics (reading from sensors, sending to displays).
- UART/Serial for debugging or device-to-device communication.
- Bluetooth Low Energy (BLE) for wireless communication.
Software Tools
- Git basics: clone, commit, push, pull.
- Arduino libraries: how to find, install, and use them.
- Wokwi/Arduino simulator debugging.
Learning Resources
Arduino Programming Basics
- Arduino Language Reference
- Functions
- setup()
- loop()
- custom functions
- Variables/Data types
- int
- float
- bool
- String.
- Constants:
- HIGH/LOW
- INPUT/OUTPUT
- LED_BUILTIN.
- Operators:
- arithmetic
(+, -, *, /, %) - boolean
(&&, ||, !)
- arithmetic
- Functions
- Arduino IDE Guide
Debugging & Timing
Hardware Communication
Software Tools
Run An Example
- Connect pre-constructed arduino to computer using the Arduino IDE
- Select the COM port where the Arduino BLE is located
- Load an example into the sketch editor
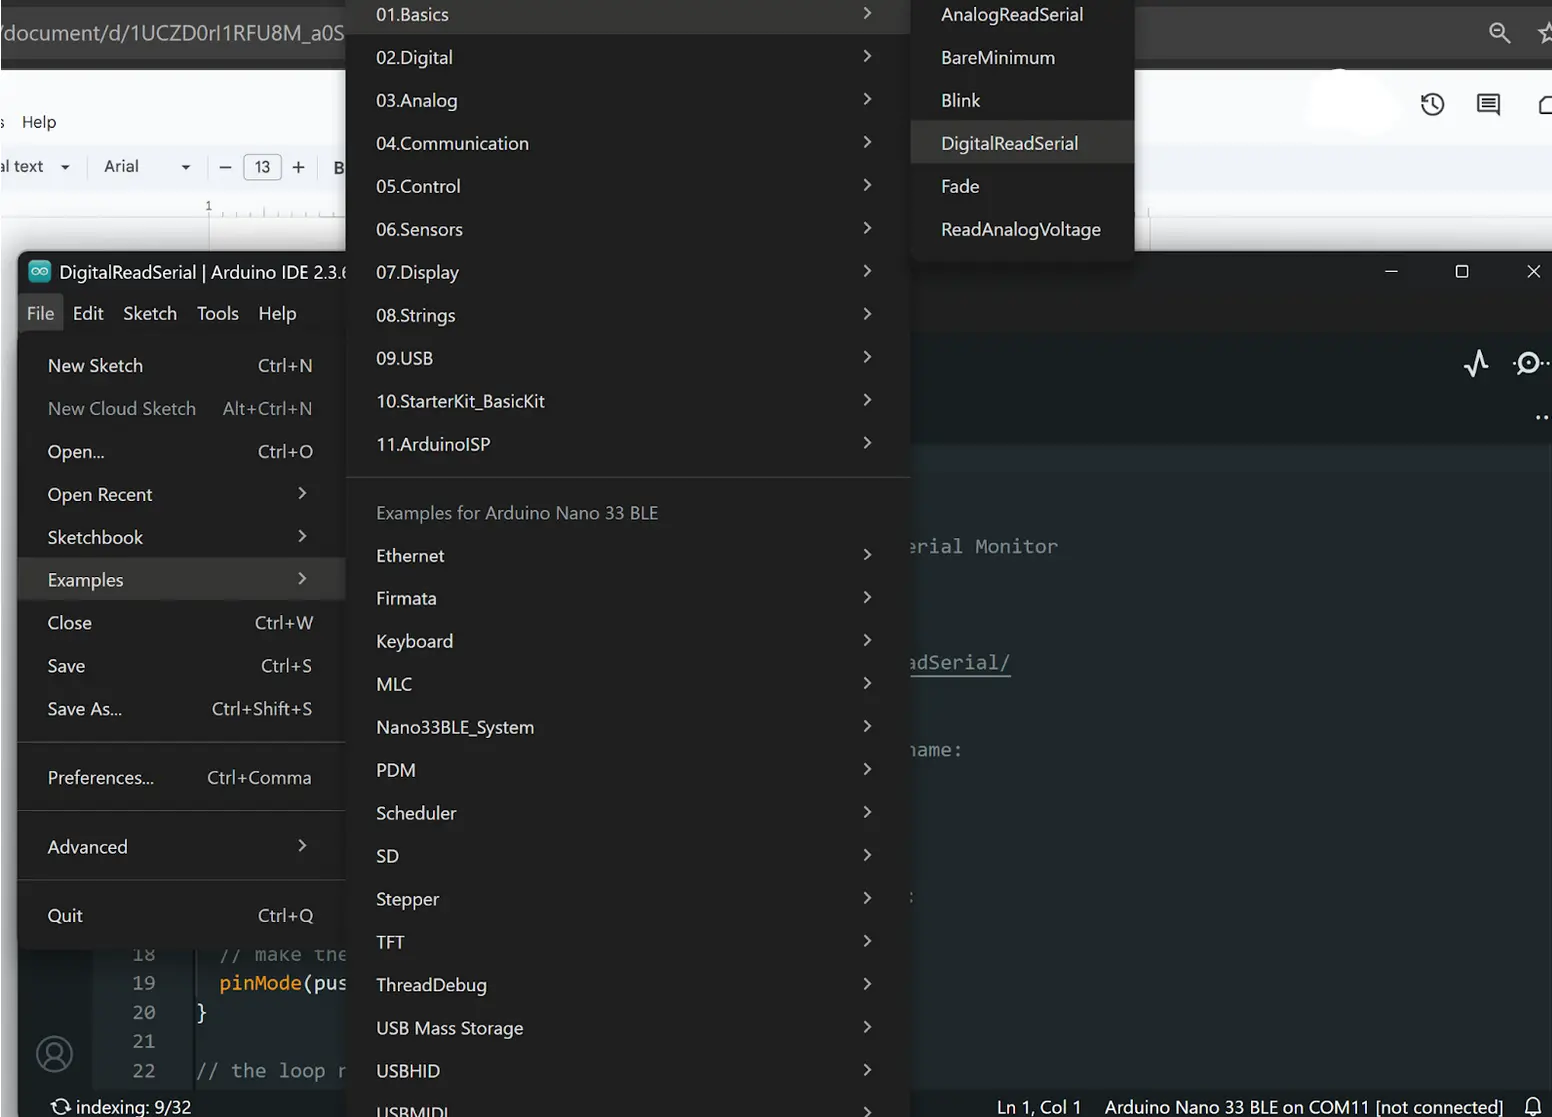
- Go to File -> Examples -> Basics ->DigitalReadSerial.ino
- Ask for the Firmware Arduino Example Circuit from the chair and connect the floating wire to the correct digital pin (D2) using the the Arduino BLE Sense Pinout
- If not in person complete next step using wokwi
- All you have to do is connect the correct digital pin to the button.
- If not in person complete next step using wokwi
- Upload the code to the arduino
- Go to Tools -> Serial Monitor to open the serial monitor.
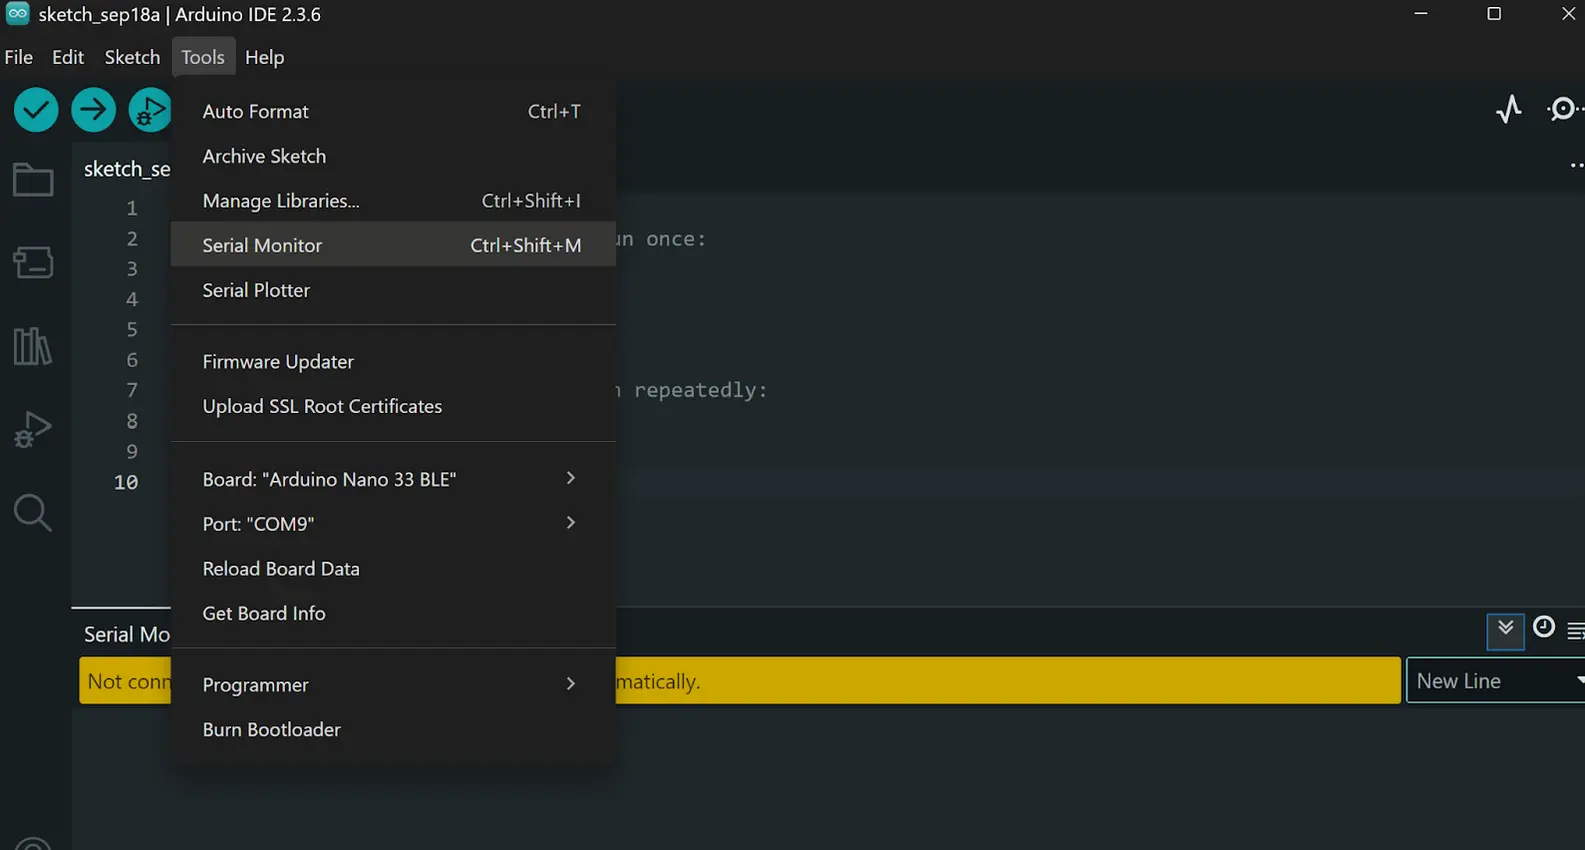
- Push the button on the breadboard.
- Take a screenshot of the entire screen with the sketch, serial monitor, and time in view.
Learning Check
Before moving on to the demo task, please complete our knowledge check to demonstrate a basic understanding of some of the resources we will be using, and submit a screenshot of the example running. Both of these tasks can be done through through our google form.
Demo Task
- Navigate to the Firmware folder in the drive
- Download the thermistor_demo.ino file
- Open the file in Arduino IDE
- Debug and Fix the errors in the demo file (Hint: Refer to the pinout diagram of our arduino.)
- Demo thermistor circuit working as intended:
- Red LED should turn on when holding thermistor
- Yellow LED should turn on at room temperature
- Green LED should turn on when cold